Last weekend I sanded the remaining side of the horizontal stabilizer plug, and also sanded all the troublesome curvy bits like the leading edge and the tips.
It turns out that the sanding isn't nearly as onerous as I had come to expect. The Poly-Lux sands easily and consistently. It doesn't load the sandpaper like many polyester products do, so a simple wipe against my denim jeans cleans the paper. And the dust isn't particularly objectionable.
I did most of the sanding on Saturday morning. Sunday morning Brigitta and I went to the local climbing crag where I cranked off a 5.9 warmup and then a taller 5.10a. After a nap, I went back up to the shop in the afternoon, made a quick-and-dirty wave guage, and did some finish-up sanding.
By the end of my Sunday afternoon session, I had sanded about all of the plug as I thought needed it, and now it is ready for a coat or two of the Poly-Lux gloss white.
I feel that this activity is something of an inflection point in the project. Now I have a pretty high degree of confidence that I hold the tools and techniques necessary to bring the wing plugs to the necessary degree of finish to make good molds.
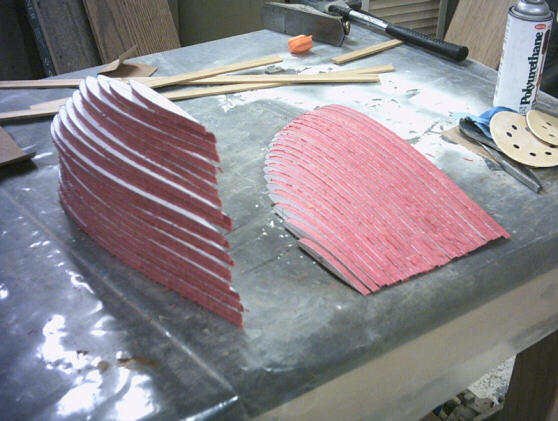
Last week I also started working on what I call the "default wingtips." These are the basic wingtips that get molded onto the ends of the wings. My original intent was to have the tips CNC milled according to a very nice 3D model that Brad Hill did for me. However, it turned out that the CNC milling was more expensive than I originally anticipated. So I decided to go with a simpler tip design that I could easily implement using the "rib stack" technique that we also used for the stabilizer tips and the wing/fuselage fillet. So far I've got all 23 rib pairs bandsawn and sanded to profile, and also bored for the threaded-rod stacking axes.
Here are the latest pictures of what's going on:
Here's my two stacks of tip ribs. The stacking is inconsistent because they weren't stacked on their alignment axes yet.
Here I've got one tip stacked on one of its two 3/8" axes.
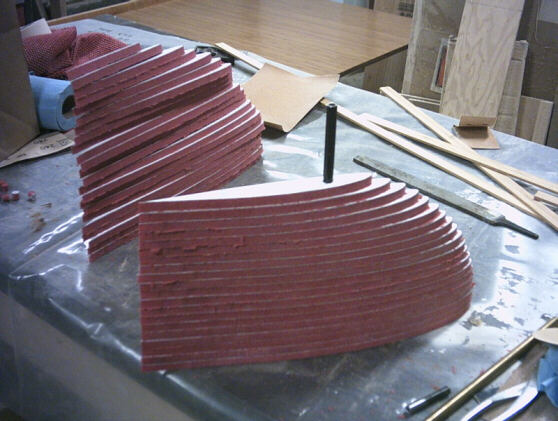
Here I'v got both tips stacked, and one has its 1/4" aft stacking axis installed as well. The next step is to glue all the ribs together and clamp them with theaded rods installed in the stacking holes. When I glue them, I'll probably re-order the ribs so that the sides with the template paper glued to them face inboard, and not outboard as shown.

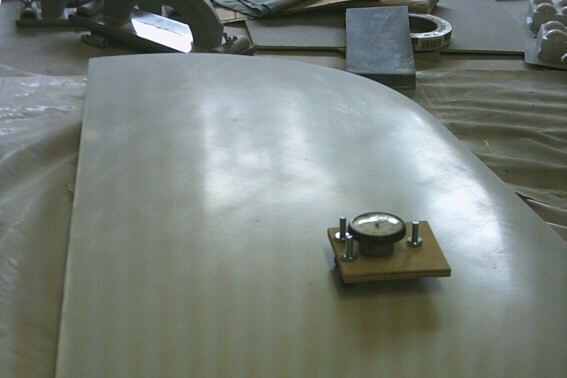
Back up at the shop, here I'm doing a preliminary assessment of the stabilizer plug surface waviness. I'm not too sure I'm measuring correctly, but it looks like about .002" to .003" of waviness.
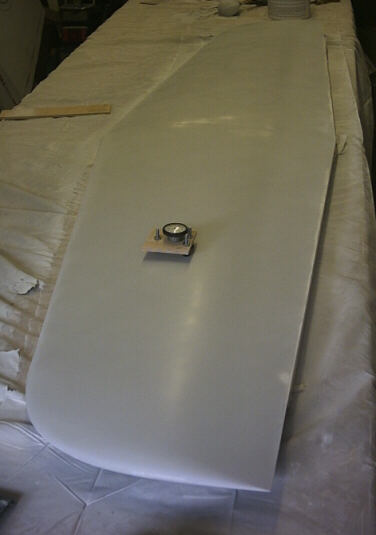
Another view of the sanded plug. Note that I went through the gray Poly-Lux sanding primer in a few spots. Fortunately, the hardness of the Poly-Lux is pretty close to that of the Poly-Fiber UV Smooth Prime below it.
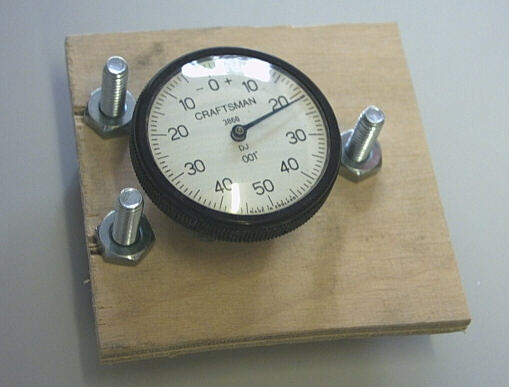
A closeup of my improvised wave guage. The dial is from a general-purpose indicating kit, and the chassis is a chunk of 1/4" plywood.
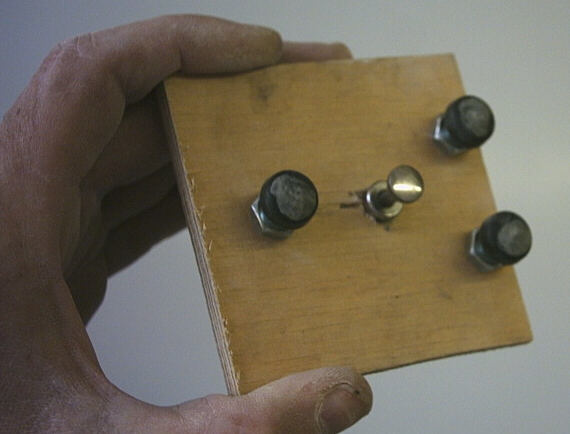
The underside of the wave guage. The screws are 12-24 countersunk screws, fitted with nylon screw finish caps.
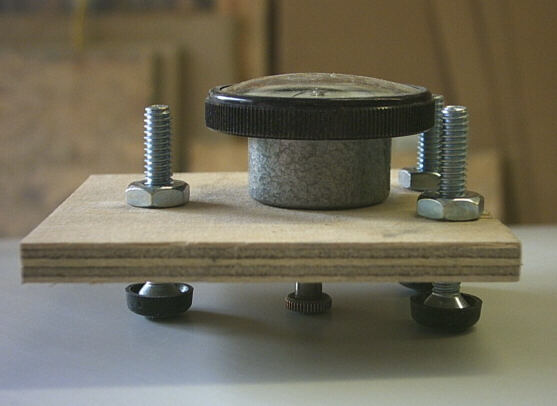
The wave guage on the measurement surface. The dial indicator is just friction-fitted into a reamed hole in the plywood.
page updated 11 October 2004 all text and graphics copyright (c) 2004 HP Aircraft, LLC