I've spent a lot of the last two weekends working on Doug Gray's new Komet trailer. This trailer was originally fitted for Grob 103, and we've been "re-purposing" it to fit the ASK21. A lot of the work was to restore and reinforce the front clamshell pivots, and most of the rest has been to make the fuselage dolly fit properly.
Fuselage dollies for non-retractable 2-seaters embody a bunch of thorny problems. Because the gear doesn't retract, the dolly has to support the fuselage in the trailer at such a height as that the main wheel is clear of the floor--otherwise the fuselage wants to tip over in the trailer. However, the dolly also has to be low enough so that it goes under the fuselage into position without undue force. Since 2-seaters tend to have empty weights approaching half a ton, you can't just slide the glider up into the dolly until the wheel clears like you do a (relatively) light single-seater. There's just too much weight and friction for one or even two people to overcome.
The typical solution seems to be to incorporate some sort of jacking feature into the dolly. You lower the dolly, pull the glider into position, and then jack the dolly up so that the main wheel is clear of the ground. That's how the dolly that came with the trailer was. The trouble is that it didn't go low enough for the ASK21, and when jacked all the way up it didn't go high enough to get the main wheel all the way off. So we did a bunch of hokey-work to increase the range of the dolly while not compromising other aspects of sturdiness and usability. I think it will work now, but if not I think I'll just make a whole new dolly and be done with it. Part of the problem is that the Komet-built original is completely welded, even the pivots, so the only way to modify it is to cut and re-weld.
On the HP-24 front, I laminated up parts for the male mold for the first-article airbrake boxes. The plan there is to make a slab of 1.9" stuff, cut it to the inside dimensions of the airbrake box, add a couple extra features for the longer (chordwise) areas where the airbrake arms and overcenter bellcranks go, add a slab to form the top skin bonding flange, slather it with packing tape, and try to pull a couple of parts off of the outside of it. I know that it won't work very well, but it's fairly easy to do and I believe that it will work well enough.
What I did to make the 1.9" slab was laminate three plies of 1/8" masonite and two plies of 3/4" fiberboard using Elmer's carpenter glue. Now that that's cured, I'm going to bevel-cut the outside edges, and then do an opposite bevel cut diagonally through the middle to yield mirror-image slabs to form the right and left airbrake slot plugs.
This is actually the second attempt at laminating the 1.9" slab. The first attempt, which I did in Steve Smith's garage last week, came out rather poorly. I tried using deck screws and clamps and clamping strips to hold the parts together while the glue cured, but the thickness came out quite uneven. The screws disrupted the material, and the threads engaged the laminate plies unevenly. So I piled on every C-clamp that Steve had (and that's a lot of clamps), resulting in an huge, messy, unwieldy pile of iron and masonite.
The turning point came when Steve looked over my shoulder at the amount of glue I was applying, and observed that it wasn't nearly enough to fill the inter-laminate gap unless I was going to apply a heroic amount of clamping to the assembly. Then, of course when I was most of the way done with making a useless mess, that's when the light bulb went on. I wrapped up the mess as quickly and optimistically as I could, and slunk off to regroup.
So this weekend I did all the same stuff over, using the same plies and the same glue, applied with the same leanness, and achieved vastly improved results. The difference was that instead of using a bunch of C-clamps and screws to discretely and unevenly clamp the assembly together for curing, I used tools and materials I already had available to apply an absolutely homogenously distributed 3600 pounds of clamping force. I just zipped it all into a vacuum bag, sucked it down to 16" Hg, and then went away for a day while the glue cured.
On Sunday, Doug and Brigitta and the kids and I went for a hike along the edges of Tuolumne County's Table Mountain. We parked at the end of Shell Road with the local rock climbers, and then continued down the closed portion of Shell Road to where it re-opens on the other side. There we hung a right and hiked north above the shore of New Melones reservoir towards the dam. We tired out and turned back before actually getting to where we could see the dam, but it was a great walk nonetheless. The wildflowers were just starting to bloom, the poison oak was only just starting to leaf out, and we saw lots of interesting critters including horses and the largest garter snake I've ever seen.
Sunday night we went back to the shop to unbag the slab, thats when we took these photos:
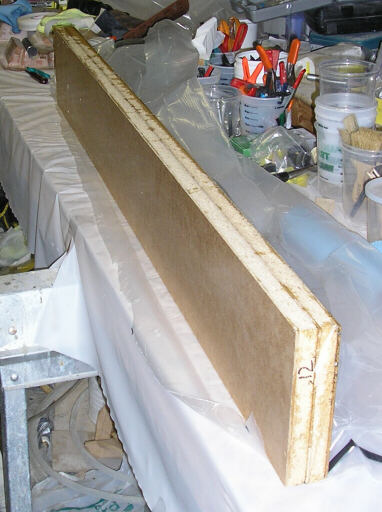
The slab. The "12" marking indicates the heritage of the thicker plies as 12" x 12' x 3/4" particle board shelving; that being the size yielding the least waste with the fewest ply breaks.
Oblique view. The slab is about 7.6" x 60" and will yield slot plugs for the right and left airbrake boxes.

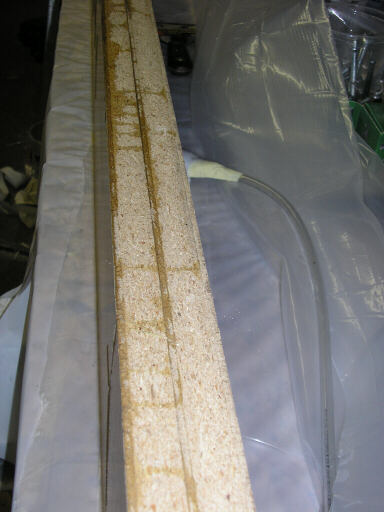
Closeup of the 5-ply slab edge showing the nice uniform thickness. The dark lines that look like gaps are actually just areas where the thin plies run proud of the thicker ones. That'll go away when I clean the edges on the table saw.
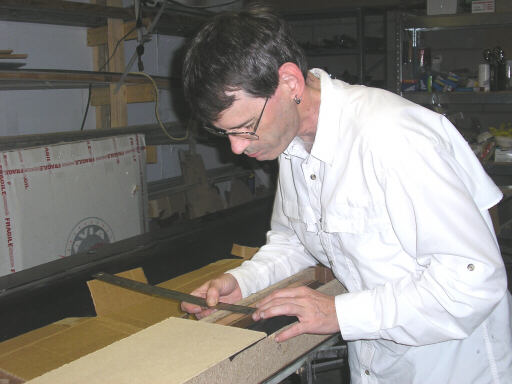
Here I measure the development airbrake parts again for the zillionth time to make sure it will all fit into the 1.9" slot.
Homebuilt aviation is not for folks who don't try things at home.
page updated 18 March 2007 all text and graphics copyright (c) 2007 HP Aircraft,
LLC