This weekend I prepared one of the smaller molds for a layup that I hope to do over the Thanksgiving break. I also did some rough carpentry that will help to open up some floor space at the HP shop for bringing in both of the large fuselage molds. I'm working towards doing a set of the fuselage shells over the Christmas break, specifically in the week between Christmas and New Years.
The pictures pretty much tell the story:
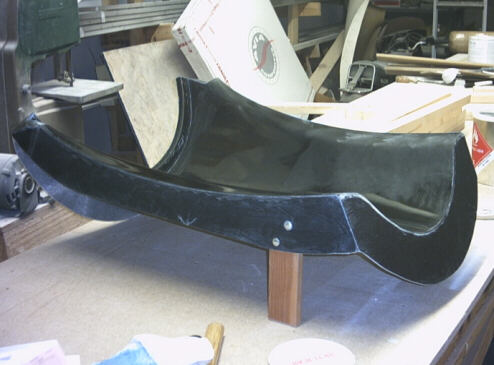
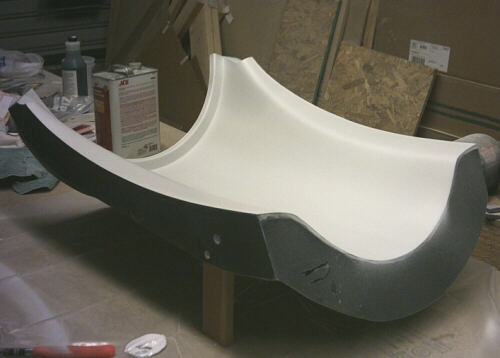
Here I'm most of the way through waxing the turtledeck mold. You can see the wax haze in one corner of the mold; the rest is shiny, shiny black. In all I applied five coats of TR-104 mold release wax to the mold. I'll ask around to see if I can use a car waxing machine for this on future parts. Applying those five coats of wax was a real arm acher; if I have to do it by hand on the full fuselage molds it's gonna take several hours.
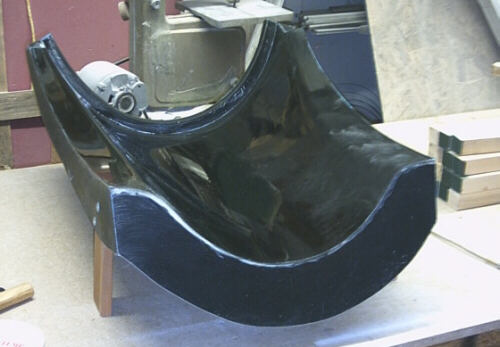
Here I've sprayed the mold with a coat of Poly-Lux 200-series gelcoat and a coat of Poly-Lux 670 sanding primer. The idea is that the 200 sticks to the waxed surface without whale-eyeing, and the 670 seals the 200 from the air so that it cures and also gives it a good interface to the epoxy of the structural laminations. The 200 didn't spray very well for me; even with it thinned to the allowable max with acetone and styrene it still went on way too gloppy.
About halfway through spraying the 670 I had one of those "Hmmm" moments when I realized that I couldn't remember catalyzing the 670 with MEKP. I finished spraying it, and then went back through the mass calculations I'd used to thin the material and found an extra 2% that must have been the MEKP, so it was thinned. And on Sunday evening, when I returned to the shop to switch off the heater, it had indeed cured. In the foreground of the lower photo you can see an area where I scratched the cured gelcoat overspray off of the waxed mold with a light pass of my thumbnail. It was reassuring that it came off so easily; it gives me hope that my finished part will separate from the mold with similar ease.

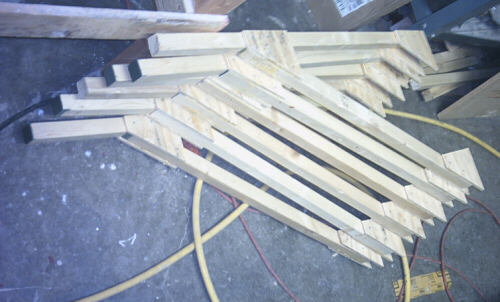
Since Sunday was my day to watch the kids while Brigitta worked, I only had a couple hours to play with the molds and gelcoat. After that, I cut up some chunks of plywood and 2x2 to take back to the garage where I keep a homemade table saw. There, I chopped out a bunch of gussets and sticks for this set of shelf brackets, and used a bed-of-nails jig to assemble them. It was just like making wing ribs for a 6x scale Aeronca. I will use these brackets to store the wing plugs on while I'm working on other stuff.
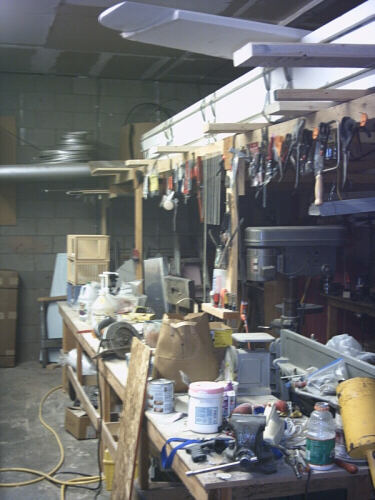
This is part of the problem that the shelf brackets are designed to help with. Not the messiness - that's endemic of organizationally disfunctional folks like me. The problem is that the set of overhead racks that I built to support the legacy HP/RS forward fuselage pods, and now use to support the HP-24 wing plugs, make about half of my floor space unusable. At least, it makes it very difficult to handle the large fuselage molds.
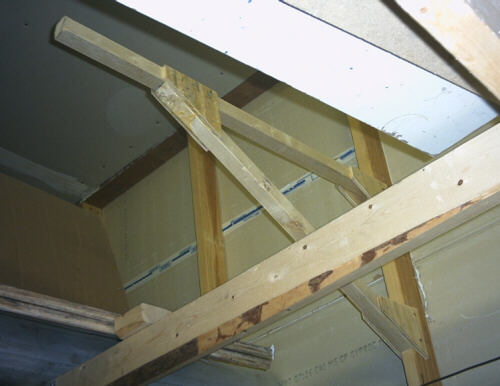
Here's one of the six brackets in place. Note how it is cantilevered out from the wall on the stud. That way, I don't need the vertical stanchions of the old racks, and that frees up the floor space below the bracket. The transverse 2x4 in the foreground is part of the original pod rack system.
I was originally skeptical of the idea of cantilevering stuff from these studs. Then I got a peek into the neighboring bay when that occupant came to fetch some stuff. They have huge chunks of lumber suspended from their side of these same studs. Now I think that I'm better off with something on my side of the wall to balance what's on theirs. I did test one of the brackets with my full weight applied at the very end of the bracket, and it held fine. That's about 4x the worst-case loading when all six are installed and sharing the distributed weight of the wing plugs.
In other news, I encountered what might be an interesting career opportunity this week: I got a change to audition for a position as a co-host on the Discovery channel show MythBusters. It is an opportunity to apply my zeal for addressing urban legendry, and also apply what's left of my mechanical resourcefulness. I don't think my on-camera work went as well as I'd hoped, but I did have a fun time visiting with Adam and Jamie at their M5 Industries shop in San Francisco.
page updated 22 November 2004 all text and graphics copyright (c) 2004 HP Aircraft, LLC