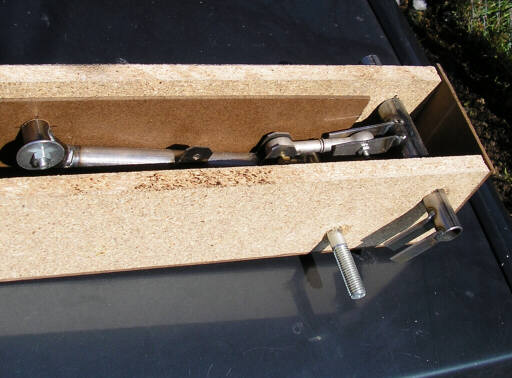
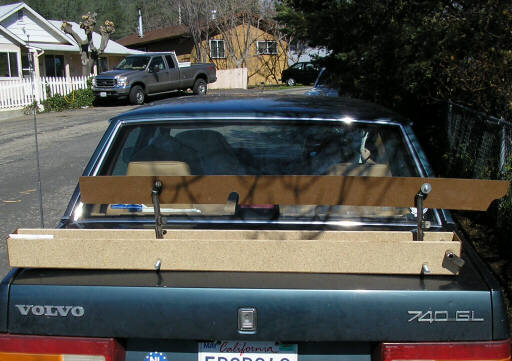
This week I made a good start on the testbed airbrakes. I got the testbed box completed, the arms and overcenter installed, and made the blade portion of the main paddle. Yet to do is to add a cap strip to the main paddle and make and install the secondary paddle. The plan is to put together a bunch of wood and masonite parts, get the geometry right, and figure out what tweaking will be required to generate the closing force necessary to hold the cap strip down against its springs.
After I get the geometry tweaked out, I'll be replacing development parts with flight prototypes on a onesey-twosey basis. At the end, I'll have a set of parts I can confidently install in the first-article wings.
I have a feeling that one of the adjustments that will be necessary is the length of the outboard airbrake arm. I've seen that adjustment on LS gliders, and it's always puzzled me until very recently. It turns out that you can use the length of the airbrake arms to tune the closing of the brakes so that the inboard and outboard ends of the cap strip touch down together. The LS gliders us some sort of odd non-swiveling rod end bearing, but I don't have a source for those so I'll probably just weld up a transverse steel bushing at the end of a 3/8-24 threaded shank.
One unfortunate thing that happens when you tune the mechanism by changing the length of one of the arms is that your mechanism is no longer a perfect parallelogram, but rather some other similar four-bar link. However, about the only thing you lose by not having a parallelogram is that there's no place where you can hang the secondary paddle on simple pivots. But there's a pretty easy fix for that - just mount one end of the secondary paddle on a slotted hole. That's what the LS guys do, and it seems to work fine for them.
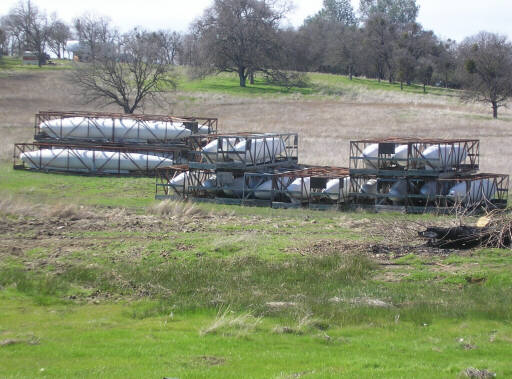
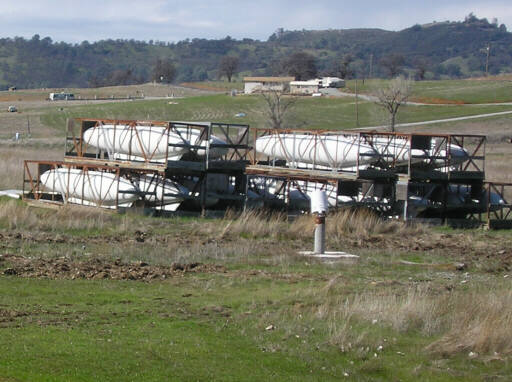
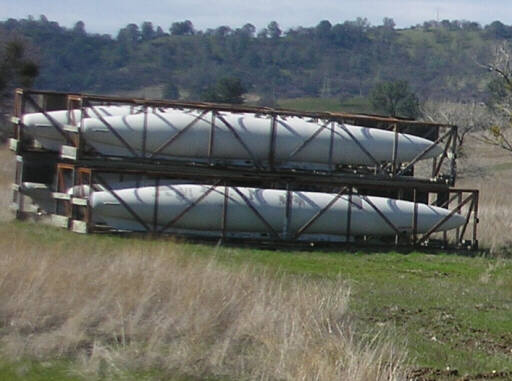
Well, that's pretty much the work this week; I'll be away from the shop this weekend. Today Alia and I went looking for a climbing crag down by New Hogan reservoir, and found the way blocked by intimidating "No Trespassing" signs. However, it wasn't a total loss - on the way to New Hogan we encountered an odd stack of what looks to be surplus centerline stores tanks for a large fighter or small bomber. Please let me know if you recognize them from the photos below.
Tomorrow I'm off to San Francisco for an overnight stay on the Balclutha while Alia participates once more in the Maritime Society's Age of Sail interpretive program.
Here's the deployment drive in the airbrake testbed. It still lacks the stowage overcenter; that's in the works.
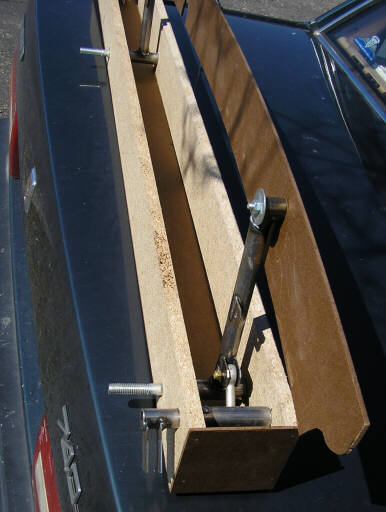
Airbrake deployed. The secondary paddle is still absent; I'll try to get it fitted this week.
Another view of the testbed. Note that the arms pivot on 1/2" hardware store bolts. The flight articles will pivot on ball bearings secured with 6mm bolts.
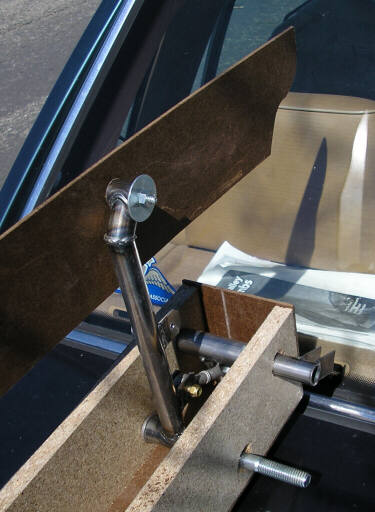
Another view of the deployment drive and inboard airbrake arm.
The next three photos show those external stores tanks we encountered out near New Hogan. My guess is that they're just over 22 feet long and about 4 feet diameter. Please let me know if you recognize the type. My guess is that somebody got a great deal on them at a surplus auction down at Beale or Castle or somewhere like that. I know that people used to make gliders and airplanes using drop tanks for fuselages; imagine what you could do with one of these!
Homebuilt aviation is not for folks who don't try things at home.
page updated 24 February 2007 all text and graphics copyright (c) 2007 HP Aircraft,
LLC