The last couple weeks haven't rustled up much in the way of visible progress, most of what I've been doing is more in the way of itty-bitty stuff. For example, I finally cleaned off the left upper wing mold and dialed in the welded steel spider that locates all the wing internals. I also started welding up the fixture that locates the left wing spar stub and lift pins, and that's pretty photogenic, but I didn't have a camera handy.
Also, a couple of weeks ago I bought a new car, new to me at least. It's a 2003 Dodge Neon in Flame Red color. I've been joking that I like rental cars so much that I just went out and bought one of the darn things. It's been a real education. As an OBD II compliant car (as pretty much all cars are these days) it is intensely computer-controlled, much more so than the early-1990s FI cars I've had lately. It has a nice peppy 2-liter engine, and the handling is very sharp yet predictable. Mine came with 185/65-14 tires, which is seriously too little rubber for my taste, so the first thing I did was put in an order for 205/45-16 tires on a set of cheap alloy wheels. I thought about making a set of rat-rod 16x7 steel wheels using the original wheel centers welded into new rims like I have on my Volvo 740, but in the end the alloy wheels were cheaper and easier. The wheels and tires arrived this morning, and I plan to put them on the car and get some photos Friday afternoon.
Meanwhile, Brad has been going through no small amount of trouble with his fuselage. It seems that we didn't do a very good job with the gelcoat on his fuselage, and it didn't stick very well. So Brad peeled and sanded most of it off, and then re-sprayed his fuselage in new Prestec. Going forward, we absolutely must either dial-in our gelcoat processing, or just throw in the towel and mold everything black and leave it to the glider builder to apply the exterior finish of their choice. I favor that because it makes everything easier on my end, but at the expense of some seriously un-fun pinhole filling.
One thing I have accomplished lately is to get the last of the big control stick system parts welded up. This last round of welding was the torque tube that pivots in pitch, and to which the stick itself is mounted.
Here's the photos:
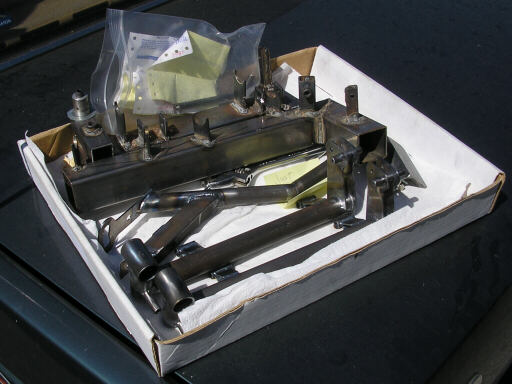
My box of ironmongery fresh from the welder and still piping hot (really!)
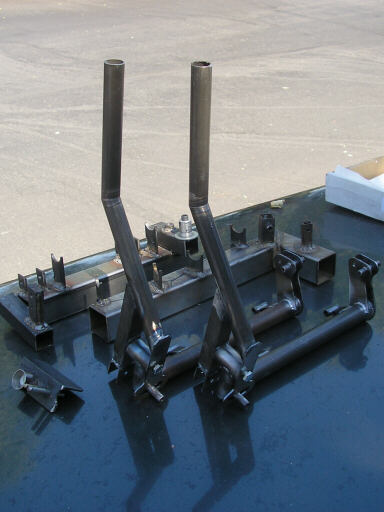
Two photos of the semi-assembled stick mechanisms. Also shown are the jigs for the stick and torque tubes, and also the jig for the pitch pivot lug subassembly. The arm at the port end of the torque tube drives the elevator push-pull tube, and the cross-pin through the end of that arm engages a slot that constitues the pitch input stops. That pin-in-slot control stop isn't really up to JAR22 standards, but it is better than a lot of what you see in homebuilt gliders.

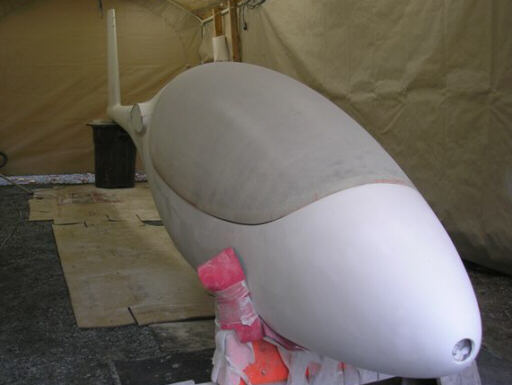
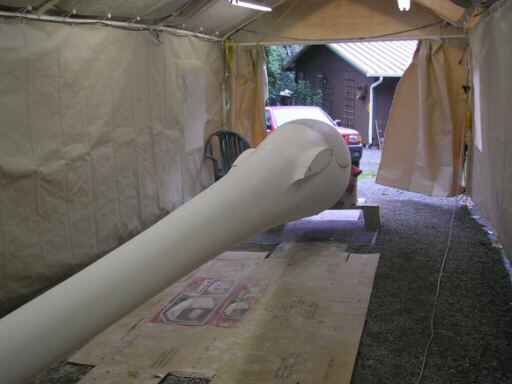
Two photos of Brad's freshly-resprayed fuselage, in a spray booth he set up next to his workshop.
Homebuilt aviation is not for folks who don't try things at home.
page updated 24 September 2008 all text and graphics copyright (c) 2008 HP Aircraft,
LLC