The weekend of 24/25 November I spent Saturday in the shop, and Sunday on Yosemite granite.
At the shop I did a bunch of calibration measurements on the horizontal stabilizer molds, and made a few simple squish plugs.
At Yosemite I teamed up with former China Lake rocket scientist Steve York to climb the old-school classic Reed's Pinnacle Regular Route. Eat yer heart out, Anthony Hyde! This four-pitch (we did it in three) odyssey takes you 200 feet into the sky, where you proceed to execute a spelunking traverse behind the pinnacle through a squeeze chimney so tight I had to exhale to squirt my way through the shallowest constriction. Thereupon you head back up the far side of the pinnacle to a ledge where you start the raps to the deck.
Back at the shop 1 and 2 December I cut back the original squish plugs to six pylons that I used to set the height for a welded fixture that locates the C-section horizontal stabilizer shear webs. This fixture will also locate the root rib and tip hinge ribs, and probably the main lift fitting besides.
Welding the fixture was a bit of an adventure, since I was working directly over a part and directly over the mold. The procedure I settled on was to lightly tack weld the fixture over the mold, and then take it outside for the final welds.
Next weekend, I'm not too sure what's happening, except that I'm pretty sure it won't happen at the shop. Either I'm going with the family on a shopping trip to San Francisco, or I'm hopping a ride down to Mojave to check on an airplane project.
Here's the pictures:
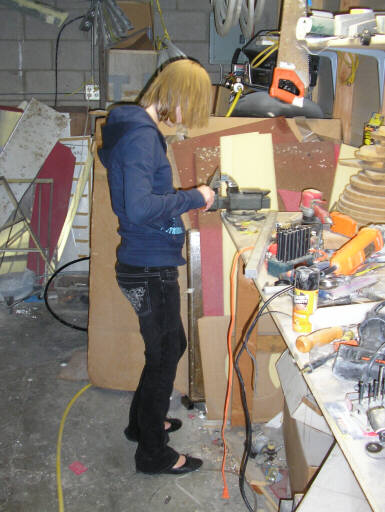
On Sunday Alia came up to the shop to help out. Here she's making a bunch of mounting feet for the shear web fixture.
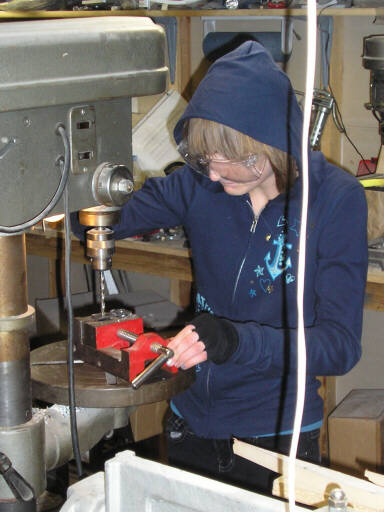
And here she is again drilling a bunch of spacer shims for the fixture. I decided I'd weld the fixture together with .025" shims under the feet. Then, when I removed the shims I'd have that .025" for bonding paste.
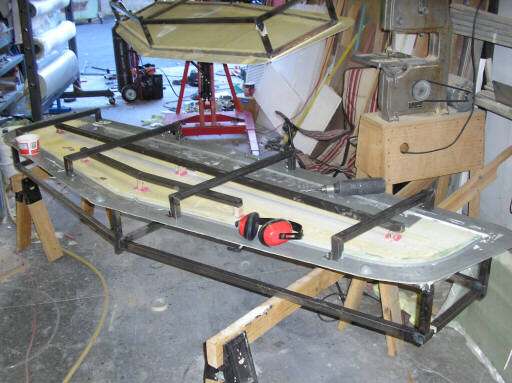
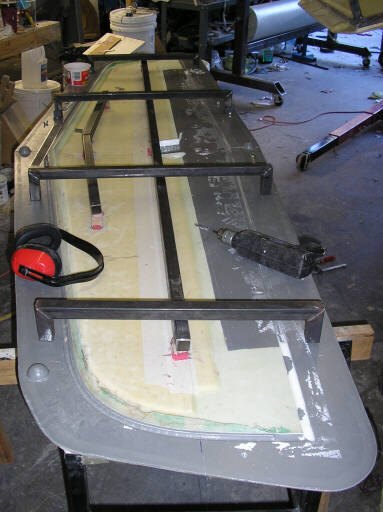
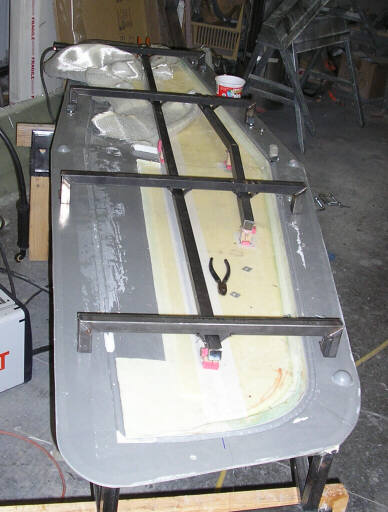
Here's my first look at the arrangement of the fixture. The four bridging arms mount along the leading edge at four of the holes that secure the bonding joggle fixture. Along the trailing edge they mount at four new holes. In this photo the spanwise members are just resting on the squish pylons.
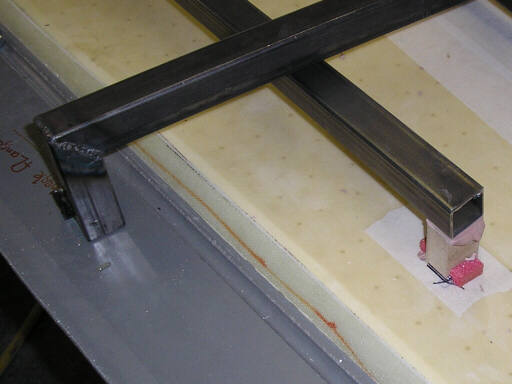
Here's a closeup of one of the intersections between the bridges and the spanwise members, showing the squish pylon. The brown stuff is a block of rough-cut MDF glued to the inner skin with hot melt glue. The red is PVC foam gussets to keep the MDF glued down. The pink stuff is Bondo that was squish-molded between the top of the pylon and the bottom of the opposite skin.
Spanwise shot of the whole thing before welding. Actually, I have welded the intersection of the right and left parts of the forward shear web locator, but that's all.
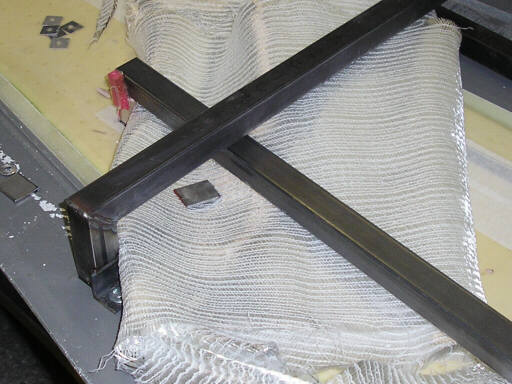
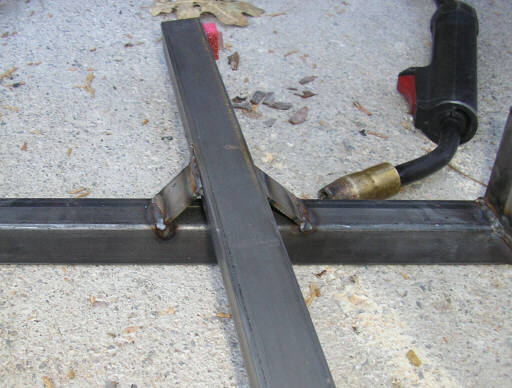
Here I'm preparing to weld one of the intersections. The fiberglass is a big scrap of DB170 Knytex folded over a couple of times to serve as a heat shield and spark arrester. Just below the intesection you see one of the steel squares that I used to connect the intersection.
Here I've tack welded the intersections between the two inboard bridges and the forward web locator.
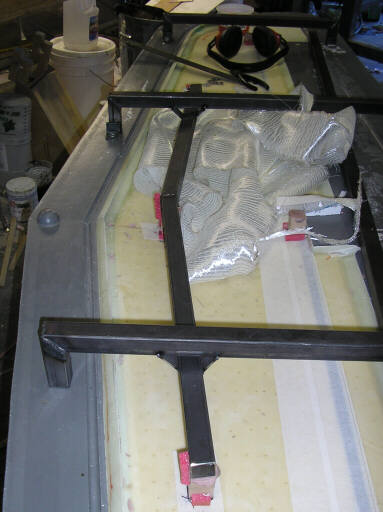
And in these two photos I've filled in the tack weld with a good solid bead.
Here I've tack-welded the aft web locator in place.
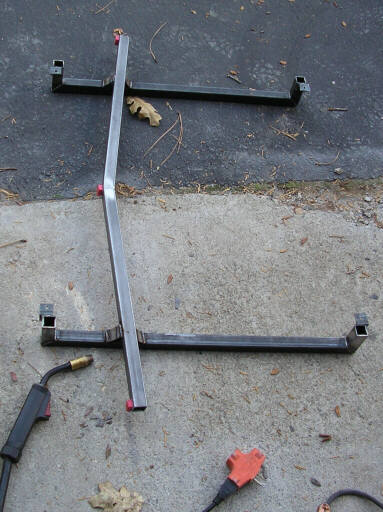
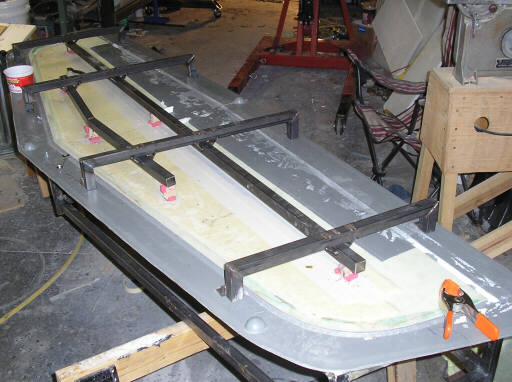
And here I'm trial-fitting the semi-finished fixture over the pylons. It still needs some straightening, but a few whacks with the hammer should bring it right down onto the pylons.
Homebuilt aviation is not for folks who don't try things at home.
page updated 2 December 2007 all text and graphics copyright (c) 2007 HP Aircraft,
LLC