On Saturday I laid up the lower elevator mold single-handedly. Then Doug came by the shop on Sunday morning, and we prepped, waxed, and laid up the upper elevator mold.
The weekend actually started at Palo Alto airport friday afternoon. My cousin Pete gave me a ride up to San Andreas in a Garmin G1000-equipped Cessna Skyhawk. That was probably the very newest airplane I'd ever flown in, a curiosity in its own sake. It had that new-airplane smell, an olfactory sensation subtly distinct from new car smell. Smell being deeply evocative, I found myself transported back to a hangar in Hillsboro, OR, where as a child I prowled among factory-fresh Piper Cherokees and Comanches while my father collected ratings towards his CFII on the GI bill.
Of course, on the outside it was that same old Skyhawk tin, except with a few more CherryLock rivets to keep the build hours down to a dull roar and a custom extrusion along the flap trailing edge where they'd previously used a rolled part. It also had a few preemptive doublers in places where Skyhawks typically collect cracks in service. And, it had five, count 'em, five fuel sample drains per side and three on the belly. When I last rented a Skyhawk (N80239 if memory serves) to pick up a girlfriend of a friend at the long-gone SJC GA center and whisk four of us out to dinner at the also long-gone Red Baron at LVK, that creaky old trainer had only one drain per wing tank and a pull-to-squirt gascolator. And when you were done you tossed the 80 octane onto the weeds that sprouted through cracks in the ramp tarmac. These days you pour your thirteen-drain-ports worth of sampled gas back into the tanks.
The star of the show was the Garmin G1000 avionics system, which collected all of the information you'd get from the six-pack of steam gauges and a full stack of electronics and a sectional and a binder full of approach plates, and projected it out onto a pair of flat screens each larger than some TVs I've owned. We had the one on the left synthesizing primary flight data, and the one on the right showning the nav and position stuff, but we could have combined the two or otherwise reconfigured the displays any of a number of ways.
The thing about the G1000 system that really gave me the warm fuzzies was where other traffic was painted on the nav page along with relative altitude and velocity vector. That system gets data from the transponders of other aircraft, and uses it to show you whether or not they represent a collision threat. Of all the things there are to enjoy about puddle-jumping aircraft, the one I miss the least is the tantalizing possibility of being chaffed out over the countryside by an unlikely but still possible collision with another aircraft. In thirty years of GA and sailplane flying I've had only two or three close calls, but for each of them I can still remember the coppery taste that immediately precedes heart-pounding incredulity at still being alive, under control, and under way. I haven't really been a fan of aviation gizmology in the past, but it was a real eye-opener to see modern integrated systems in action. I'm inclined to think it's a good direction for GA.
So, anyhow, Pete gave me a ride to CPU where Brigitta met us. We all went out to dinner at the Dragon Palace, and sent Pete on his way back safely back to Palo Alto.
Saturday I went up to the shop after a fairly lazy morning, spent a handful of time doing final prep on the elevator plug, and then laid on a coat of black TC1611 tooling coat, finishing around 1 pm. The tooling coat takes around two hours to B-stage firm enough to laminate over, so that put me at liberty until around 3pm.
I went to the Arnold library, and spent the time reading a book on the history of the Yosemite Valley railroad - actually, I just looked at the pictures. But I did read a lot of the chapter on the inclines, some as steep as 78% grade, where they'd hook a cable to a loco or train car and tow it up to the top with a steam donkey winch at the top. That puts a bit of perspective behind some of the visual props at Disney's Thunder Mountain Railroad coaster.
Long about 3pm I was back at the shop, and single-handedly laid up the lower elevator mold over the B-staged tooling coat. I think it was the largest lamination project I've ever done alone. It took about two solid hours, all of it spent in Tyvek suit, respirator, and gloves.
Regarding the gloves, I had been having trouble with itchy fingers from the gloves. I tried powdered, non-powdered, latex, nitrile, and vinyl, and had the same sort of reaction to all of them. What does the trick is wearing thin cotton inpection gloves under the barrier gloves.
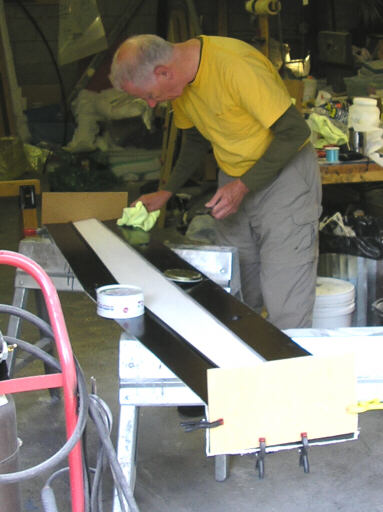
With the layup done, I did a quick acetone wipe of the shears and my precious Dritz electric scissors, and scooted for home.
On Sunday, Brigitta drove me up to the shop where Doug met us after driving over Ebbett's Pass from 89 and Truckee. We separated the elevator mold from the upper horizontal stab mold, and then separated out the various masonite dams from the elevator mold and pried out the indexing hemispheres. It all looked hunky-dory, so we proceeded to add new end dams and a squeeze-out trench feature, and started to wax it up to lay on the lower elevator mold.
Schedule-wise, Sunday worked out kind of awkwardly. We ended up with a break point noonish, and had lunch. Then back at work, I waffled about pulling the trigger on the rest of the mold. I figured we could spin out the day prepping to make a first article of the horizontal upper skin and call it an early day. But eventually I screwed up my resolve tight enough to mix a half-pot of TC1611, and on it went. That left us at liberty from 3:30pm to 5:30pm, so we broke for an early pizza dinner for which we drove down to Murphys to sup with the family.
Back up at the shop just shy of 6pm, Doug and I made quick work of the mold lamination, finishing the last ply with the very dregs of the last pot of epoxy at 7:14pm on the clock. Then we scooted direct to Sunnyvale in Doug's van, stopping only at Murphys to return Brigitta's hill-coverage-friendly cell phone and at Tracy to switch drivers.
The photos:
The lower elevator skin plug, freshly brushed with BJB Industries TC1611 tooling coat. You have to brush this stuff on very carefully to avoid breakthroughs. It helps if your plug is a different color from your overhead lights. Otherwise it's hard to tell white breakthrough streaks from white reflections from the overhead fluorescents.
Same, with cab/flox shmoo brushed along the edges and into the corners. The shmoo has this gray/slivery color because I mixed it using the same eggbeater blade as I used to mix the black tooling coat.
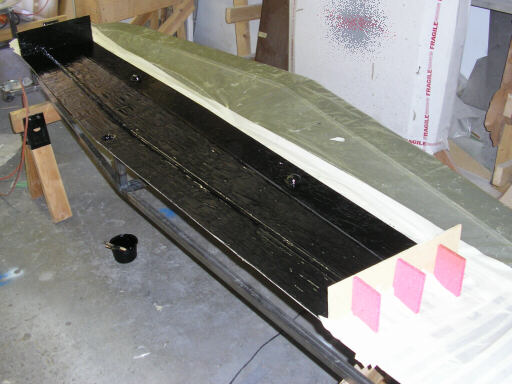
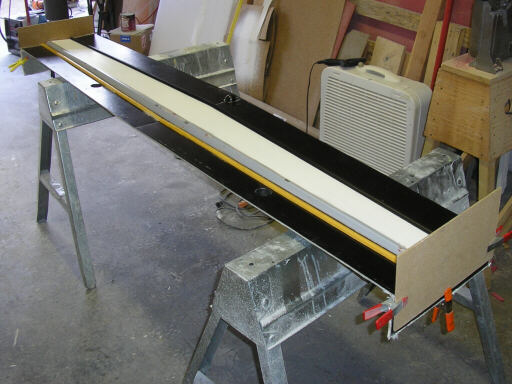
The mold with one ply of 7725 against the tooling coat and with one and a half plies of salvage DB170. Off to the side you see a ply of 18 oz. roving that I tried to apply, but which wouldn't conform. I stripped it off and set it aside.

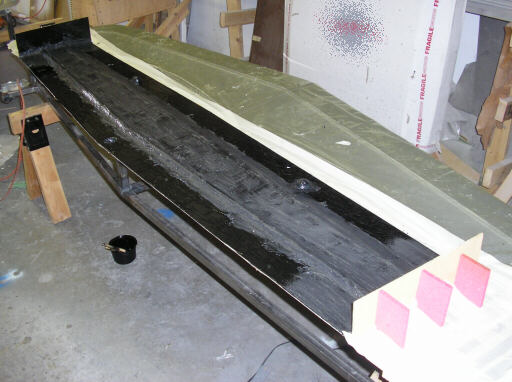
Same, after several more plies of DB170, re-applying the 18 oz. roving, and one more ply of DB170 to close.
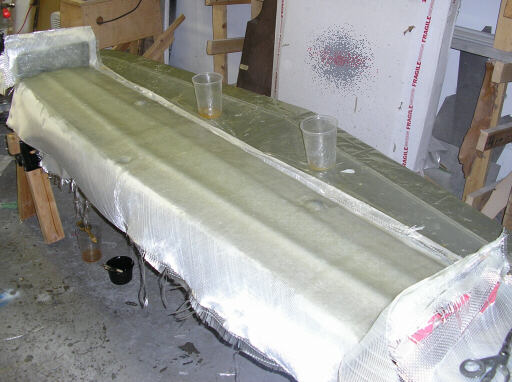
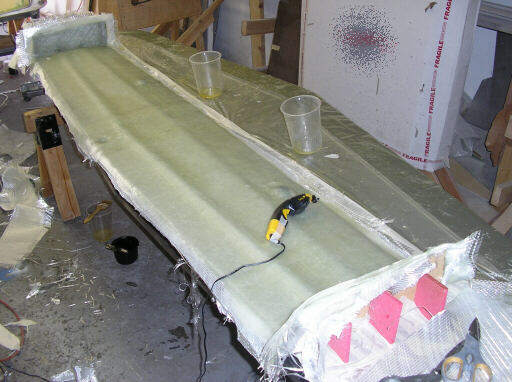
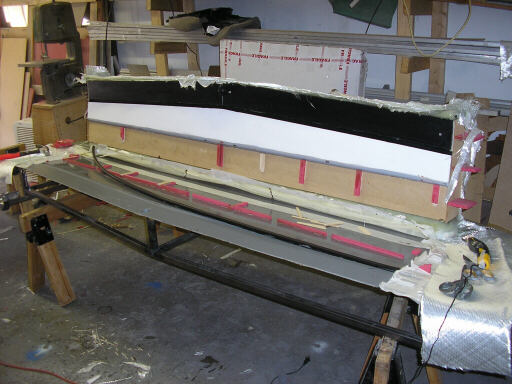
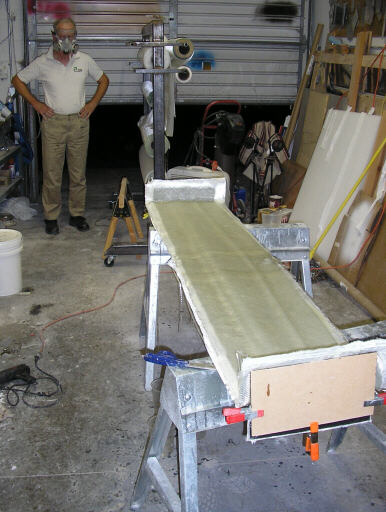
Sunday morning, this is what we found. Not the greatest show on earth, but looking perfectly usable if a bit shaggy at the edges. This photo shows it after I trimmed some of the unsaturated edges.
Broken loose from the horizontal stabilizer mold that held the elevator straight and imparted the trailing edge flange. The black tubing is the .710 drip irrigation hose that formed the aft squeeze-out trench, and the pink stuff is bits of PVC foam that stiffenedthe forward flange and side dams. It's all held together with hot melt glue, which sticks to waxed surfaces yet peels away without leaving marks. The elevator plug was glued down to the stabilizer mold with 3M Super 77 spray glue, which cleaned right off with an acetone wipe.
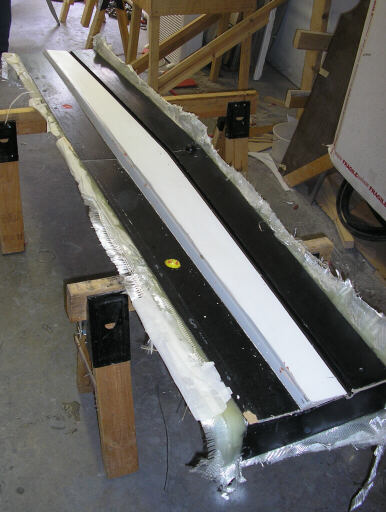
After separating the side dams and forward flange dam, but before digging out the indexing hemispheres.
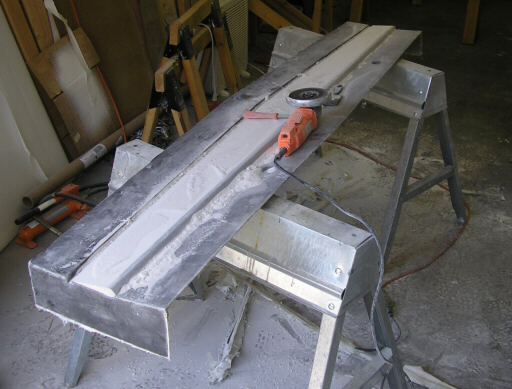
Nasty, nasty trimming operation. You wear the tyvek suit, you wear breating, ear, and eye protection, you have the two layers of gloves. And even so you feel gritty after grinding off the edges. Don't bother trying this with one of those little 1/4" air die grinders, you'll just turn a half kilowatt/hour into air compressor noise with some rotational power as a byproduct. Use a cheap electric 4" angle grinder like this one. But do pay the extra few bucks for the one with a paddle switch.
And, invite a friend over to help with the waxing. Free glider, just add work!
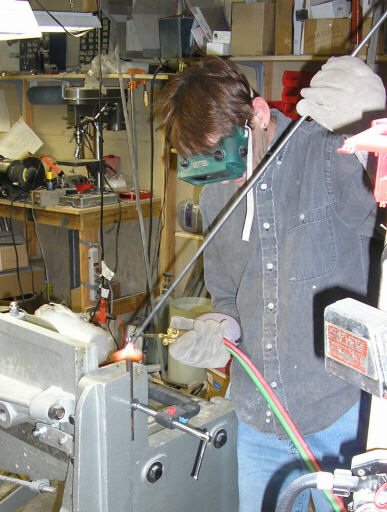
And be prepared for some ironmongery. I take a break from mold prep to make some 5/16" angle pins for the fixtures that position the hinge gudgeons in the upper stab skin. The torch is a Meko Midget, the perfect unit for small shop duty.
Mold, waxed, with added side dams and squeeze out feature along the forward bullnose.
Tooling-coated, B-staged, Shmoo'd, and laminated. Doug cut the plies for this mold, and you can tell - the raw edges are a lot more even and less shaggy than the one I did.
Homebuilt aviation is not for folks who don't try things at home.
page updated 5 November 2007 all text and graphics copyright (c) 2007 HP Aircraft,
LLC