This weekend we did the first two large layups on the inboard sections of the wing plugs. We did the inboard right top on Saturday, and then the inboard left top on Sunday. Both layups went about as well as could be expected, given that they're large gooey awkward messes.
Fortunately, this time I had plenty of help at the shop. Doug Gray drove up in his van, delivering the vacuum pump and the aft fuselage plug from the borrowed garage in Cupertino. Also on hand on Saturday was Cody Harsch from Murphys. And Brigitta came up and helped out on both Saturday and Sunday.
The email I've been receiving lately has been pretty unanimous on one point: site visitors want more photos! Good thing I just bought a new digital camera. I did manage to get some photos of the wing plugs, but not while we were doing the layups. I was either too buys or too gooey.
This weeks' photos:
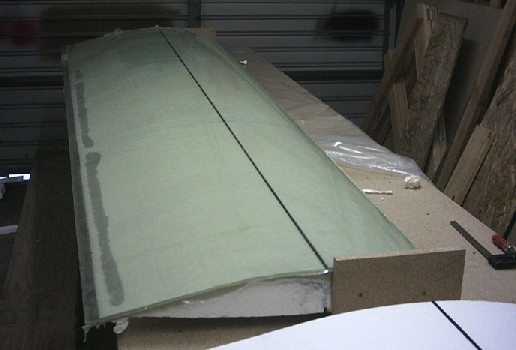
The right inboard wing plug core, with the first layup cured and unbagged. The rectangles of fiberboard at each end are handling appliances that are screwed to the broomhandle hardpoints pointed out in earlier photos. The dark areas near the trailing edge of the core are where the foam core stuck better to the lower shuck than to the fiberglass, and broke away when I separated the lower shuck. What happened was that epoxy resin got between the core and the lower shuck, either by wicking in from the aft end or by penetrating through the foam core. I'll have to repair these areas by replacing the missing foam with microballoons, and recontouring the core. The reason that I didn't get this problem right at the trailing edge was that I applied packing tape to the shucks along the trailinge edge in an attempt to prevent this problem. However, I didn't anticipate that the epoxy could wick through so far, or penetrate so deeply through the foam. The lesson here is to put some sort of release agent between the core and the lower shuck; extending at least six inches in from the trailing edge.
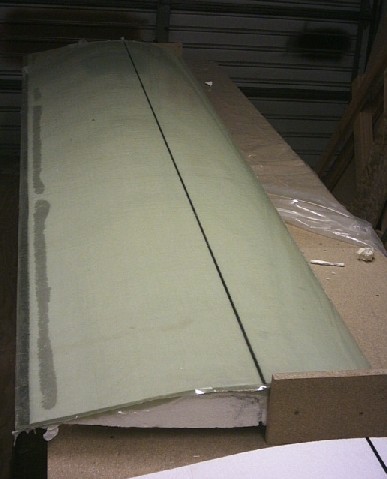
Another slightly different angle of the same subject. What you don't see is the extremely shiny surface left by the mylar. It's not going to take much sanding or filling at all to make this a moldable surface.
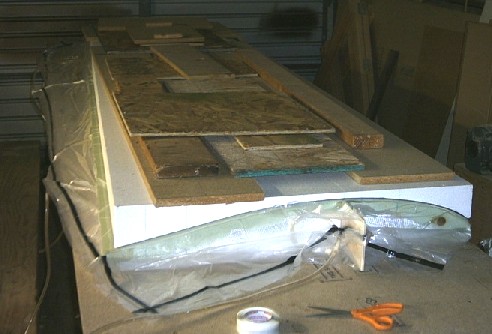
The left inboard section with the top layup bagged and under vacuum. The stuff piled on top is there to hold the whole mess flat on the table and prevent it from twisting or distorting. For this layup, I added a layer of polyethylene between the core and the lower shuck to prevent the core peelaway we got with the top right inboard layup. The thing that looks like a spar stub is a piece of plywood that I put between the top and bottom carbon stiffener extensions. That is just so that the vacuum bag doesn't try to pull the extensions together and distort the core. I added those stiffener extensions because I think that some day I might need them to align the plug wings to the fuselage when I go to form the side-of-body junction fillet.
page updated 8 December 2003 all text and graphics copyright (c) 2003 HP Aircraft, LLC